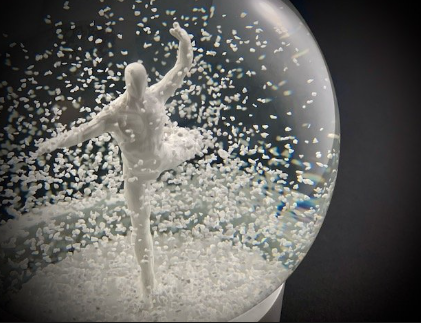
Make your custom snow globe and show your friends and family where you live from the comfort of your home! This is the best way to connect with loved ones during the holidays or have fun. All you need are supplies, which you can find at most hardware stores. If you have any questions or difficulties, don’t hesitate to reach out to us. We’d be happy to help!
What You’ll Need
If you want a creative way to keep your holiday memories alive, consider making your custom snow globe. Here are the materials you’ll need:
-A preservation jar or plastic container that will fit the snow globe
-Snow (white if making a white snow globe, colored if making a colored one)
-Hot glue gun and glue sticks
-Paint or acrylic paint in desired colors
-Craft knife or scissors
-Styrofoam or other material to shape the snow globe as desired (e.g., star cutters, cookie cutters, etc.)
-Small light bulbs (optional)
- Begin by filling the Preservation Jar or Plastic Container with Snow. You may add extra just in case the snow melts during storage. If you are using a white snow globe, be sure to use white snow instead of color so it will look more like real snow. 2. Next, take your Craft Knife and Cut Out The Shape You Wanted Your Snow Globe To Take. Try Not To Make It Too Shallow, Or It Won’t Hold The Snow Well And May Easily Fall Apart When Glued Together. 3. Once Your Shape is Cut Out, Add More Snow On Top Of It Until It’s Completely Full. 4. Now comes the fun part – Glueing! Start by adding a bead of hot glue Around The Edges Of The shape You Just Made, And Wait A Minute.
How to Make a Custom Snow Globe
Making your own custom snow globe can be fun and easy, perfect for displaying your favorite photos or memories inside. Here are five tips on how to make one:
- Choose the right material. Plastic snow globes are the most common type, but you can also find glass or ceramic globes. Just be sure to choose something that will not break when filled with snow and hot water.
- Decide on your design. You can either create a design or use an online snow globe maker to generate a template. If you’re creative enough, you might also be able to create your design using computer graphics software like Photoshop or Illustrator.
- Create the mold. To make the custom snow globe, you’ll need a sturdy plastic container and a hot water bottle (or a similar object). Fill the container halfway with warm water and place the hot water bottle, so its surface touches the water. Then quickly pop in the desired ice cubes and let them melt (this process will take about 20 minutes). Once they’re melted, carefully pour them into the mold and smooth out any bumps with a spoon or your hands (the more rustic your design is, the less polish it needs). Allow the chilled design to sit overnight, so it hardens (about 12 hours).
- Remove the design from the mold and attach it to a plaque or other
Tips for Making a Perfect Snow Globe
Snow globes are a popular holiday decoration and can be made from various materials. Here are some tips for making a perfect snow globe:
- Choose the right material for your snow globe. Many snow globes are made from glass or plastic, but other materials include metal, porcelain, or resin.
- Choose the right size for your snow globe. Snow globes range from about 2 inches to over 10 inches in diameter. Make sure to choose the right size for your object and the space you will display.
- Decide on the design of your snow globe. Many different designs are available, including floral patterns, animals, and scenes from nature. You can also make your design using paint or photographs.
- Arrange the objects inside your snow globe according to your chosen design. Some people put small pieces of glass inside the larger pieces to create a more realistic effect.
- Add water to your snow globe and wait until it has frozen solidly before putting it into storage or displaying it outdoors.