When it comes to making your modifications to your gamecube controller, there are a few things you need to be aware of. This guide will walk you through everything from choosing the right tools to learning how mods work. modding a gamecube controller is fun and rewarding and can also transform your gaming experience. If you’re interested in trying it, this guide is for you.
What is a Custom Gamecube Controller?
A Custom Gamecube Controller is a controller you create by modifying an existing controller. This guide will show you how to mod your gamecube controller. There are many different ways to customize a gamecube controller, and this guide will only cover the basics. To get more creative with your controllers, check out various online guides and tutorials.
You will need:
-A gamecube controller
-Some wire cutters or a knife
-Soldering iron and solder
-Electrical tape
– Rubber band or zip tie
-Scissors or a sharp knife
-Hot glue gun (or some other adhesive)
-N/8 male plug
-An old power cord for your TV (or use an adapter)
Step 1: Remove the battery cover of your gamecube controller. The screws are located in the corners of the cover. Use Phillips head screwdriver to remove them. Once they are removed, simply lift the cover. Note: Make sure you save the screws! You’ll need them later on.
Step 2: Using your wire cutters or knife, start cutting down one of the long wires that comes out of the gamecube controller PCB (printed circuit board). Strip about 1/2 inch of insulation off each end of the wire. Solder one end of the stripped wire to one end of another long wire you already have prepared. Do not solder the ends that were
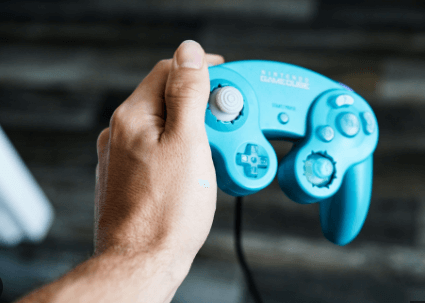
How to Make a Custom Gamecube Controller
Like most gamers, you probably have a large pile of Gamecube controllers collecting dust in your closet. Well, now there’s a better way to use them! By modding your controller, you can make it into the perfect gaming device for your specific needs. This guide will teach you that how to make Gamecube controller that meets your specific needs.
Before we get started, it is important to know the different types of controllers out there. There are three main types of Gamecube controllers: standard, pro, and mini. Standard controllers have six front and two shoulder buttons on the back. Pro controllers have eight front and four shoulder buttons on the back. Mini controllers only have four buttons on the front and no shoulder buttons.
Now that we know what kind of controller we need, it’s time to start! First things first: we need to gather our materials. We will need some wire cutters, a soldering iron and solder paste (if necessary), measuring tape, a small Phillips head screwdriver, and an adhesive (like Gorilla Glue). Next up is designing our controller. We will want to create a template out of paper first so that our controller is as accurate as possible. Once we have our template made, it’s time to start cutting! We will need 16 pieces of wire total: 8 for each button on our controller and 4
The Different Components of a Custom Gamecube Controller
There are a few different components that make up a gamecube controller.
First and foremost, you’ll need an RF emitter/receiver. This component will allow your controller to communicate with the console. Multiple options are available on the market, so it is important to find that fits your needs.
Next you’ll need amicrocontroller. You can use any microcontroller that supports gamecube controllers, but some popular ones include the Atmel SAM3X8E+ and the Atmel SAM3X8E . These microcontrollers have built-in support for gamecube controllers, so you don’t need to purchase additional hardware.
Finally, you’ll need some wires.Most common type of wire used for gamecube controllers is jumper wire. Jumper wire is flexible enough to fit inside the small spaces inside gamecube controllers, but strong enough to keep everything connected correctly. Other types of wires can also be used, but they’re not as common so they may require more explanation in this guide.
How to Install Mods on Your Custom Gamecube Controller
Many mods can be installed on your Gamecube controller, and this Ultimate Gamecube Controller Guide is designed to help you get started. Whether you’re looking to add an extra button or just want to change the color of your buttons, we’ve got you covered.
First, ensure that your Gamecube controller is plugged into your TV and switched on. Next, open the System Settings application on your Gamecube and select “Controllers & Sensors.” From here, you’ll need to find the “Configuring controllers” option and select “Customize controls.” From here, you’ll need to find the “Add a new controller” option and follow the on-screen instructions. Once you’ve completed these steps, your new controller should be configured and ready to use!
Now that we’ve covered how to add a new controller, it’s time to explore some of the available mods. You should first locate the mod file(s) that you want to install and copy them onto a memory card. Next, switch your Wii U system off and insert the memory card into your Wii U game console. After pressing Select on the gamepad menu, navigate to the “System Settings” application and press X until you reach “Memory Cards.” Now press Y until you reach “Select Card,” highlight the file(s) you copied onto your memory card earlier, and press A. Finally, press Start on the game
Conclusion
It’s no secret that the gaming community is a passionate and dedicated bunch. And with good reason – every game feels more alive when played on a custom controller tailored to your individual preferences. If you’re looking to mod your own Gamecube controller, or just want to be able to make use of all the features your console has to offer, this guide is for you. Whether you’re a beginner or an expert, we’ve got everything you need in here. So saddle up, Stranger Things are coming back soon, and there’s nothing like whipping out that old Gamecube controller for some nostalgia-filled gaming…unless it’s using our customized one of course!